John Hultgren Photography Guides

Scanning Film

Published on November 10, 2023

There are a number of ways to digitize your film negatives and you certainly have plenty of options.

Some photo labs can provide you with scans of your film at the same time they develop and process your photographs. This may be the easiest way to scan your negatives. Many labs will offer options such as different sized scans, different ways of sharing the digital files, or even different levels of color correction to your photos.

Unfortunately, not all labs do a very good job scanning negatives but there are plenty of professional photo labs that do incredible work. Just keep in mind that higher quality usually comes at a higher price. You can reduce the price by just getting scans of your favorite shots.

Cheap stand-alone film scanners are also available for purchase at around $100. Unsurprisingly, the quality of these cheap machines can be fairly low. If you’re just trying to digitize old negatives and don’t care too much about the quality, this can be an economical way to scan a large number of old negatives or slides.

Flatbed scanners have become a very popular way to scan slides and negatives. They are typically cheaper than a dedicated film scanner and may offer a quicker workflow than some other options. They can usually scan multiple film formats, such as 35mm, medium format, and slides, and they are compatible with modern computers and can be used for other scanning needs, such as for documents.

Photographers are somewhat split on the topic of flatbed scanners. Personally, I have obtained some good results using flatbed scanners but I didn't feel they were professional enough for products I wished to sell, and I instead opted for more expensive drum scanning from a professional photo lab. I was concerned with the film holders (film wants to curl and sharpness requires that the film is held flat while scanning) and the amount of space that the film holders placed between the film and the glass scanning surface, which impacted focusing. While flatbed scanners are marketed as specific “film/negative scanners”, they aren’t really much different from a standard flatbed scanner with cheap film holders included. A scanner that’s solely designed for scanning negatives is definitely going to give you the best results.

Many photographers are now using their digital cameras to “scan” their negatives. If you already have a decent digital camera, this is probably the cheapest way to scan your negative while still getting decent results.

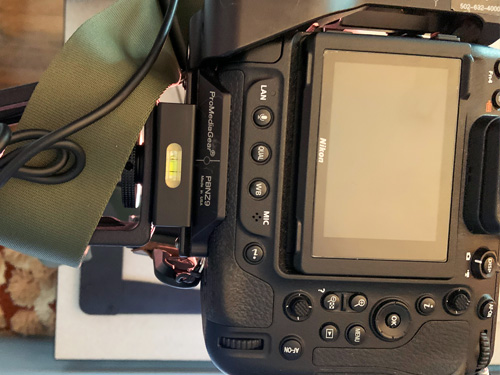
For camera scanning you are going to need a DSLR or mirrorless camera that has detachable lenses and manual controls. You will also need a macro lens preferably with a magnification ratio of 1:1.

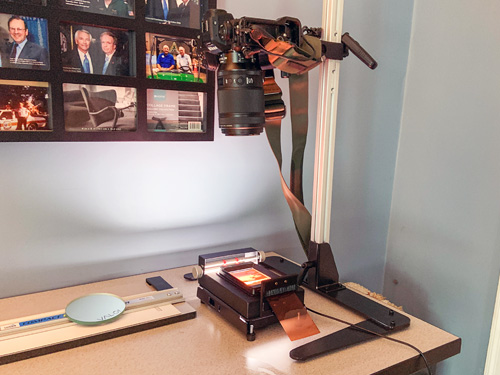
Additionally, you will need a tripod or a camera stand. A tripod with a horizontal column is preferred, but a camera stand is a better option as it ensures the camera is parallel to the negative. A shutter release cable or a wireless remote will help prevent camera shake when you press the shutter button but you can also use the self-timer mode to make sure the camera is completely still when the picture is taken.

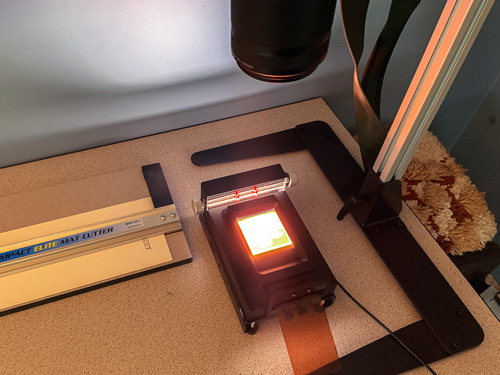
You will also need a backlight for the film. There are plenty of options available and some options are inexpensive but a dedicated light box will make the process easier.

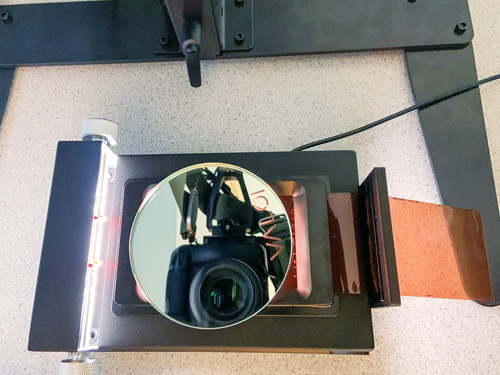
You will also need negative and/or slide holders for each size of film that you wish to photograph. Some people use anti reflective glass to hold the negative flat on the lightbox, which can usually be purchased from a framing store, but a manufactured negative holder usually produces better results. I have a 35mm, 120 film, and 35mm slide holders and masks which prevent any light from my lightbox from shining on my camera unless it has passed through my negative.

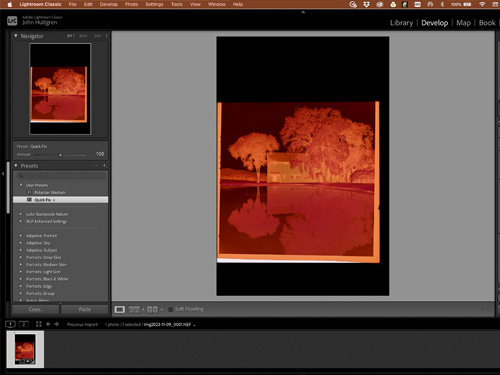
And you are going to need some sort of software to process the images, especially if you shoot standard color film since there’s a bit of work involved to invert the colors from the negative and get them looking correct.

The process of photographing your negative is fairly simple. You need to illuminate the negative from behind and position your camera parallel to the negative. You’ll want the frame on the negative to fill as much of the frame on your digital camera as possible.

I would recommend using an aperture somewhere around f/8 (which is where most lenses are sharpest) and the lowest native ISO that your camera offers.

There’s no single “best” way to scan negatives. When deciding which option is right for you consider your budget, the quality of the scans that you need, and how much time you want to spend scanning negatives to digital.

ADVERTISEMENT John Hultgren Photography
Logan 350-1 Compact Elite Mat Cutter
Valoi Essential Copy Stand
  1. This is my Nikon Z9 digital camera mounted to a Valoi Essential Copy Stand, focused on my light box.

    While using a tripod is also an option, tripods allow you to turn your camera in every direction, making it easy to position your camera at a slight angle to your lightbox, which is very undesirable. A camera stand helps to ensure that your camera and lightbox are properly aligned.


  2. Check your bevel cut and dimensions
    Neewer Aluminium 50mm Quick Release Clamp
  3. It is critical that your camera is level with your light box. Since I keep an L-Plate attached to my camera, I use an Arca-type quick release clamp to quickly attach my camera to the camera stand. This clamp has two leveling bubbles that help me confirm that my camera is level.

  4. Attach your mat to your backing board
    Position light box and camera
  5. Your camera needs to be positioned directly over the negative that you will be photographing. Placing a mirror over the negative that is held in your light box makes it easy to align your lightbox with your camera. Of course, look through your viewfinder or on your camera's display to fine-tune alignment. You want to position the camera on the tripod or camera stand close enough to the lightbox that your focused photograph on your negative is filling your camera's sensor.

  6. Position your photograph
    Focus on your photograph
  7. Adjust your focus on the negative and, while using a cable release, photograph your negative. Most lenses are known to be sharpest at a certain aperture (do some research) but f/8 is usually the sharpest aperture. The lowest native ISO offered by your camera is also sharpest with the least amount of noise. Adjust your shutter speed to get a proper exposure.

  8. Mark your upper corners
    Convert your negative
  9. You are going to need to use some software to convert your negative image to a positive image. I use Lightroom Classic, and I start by leveling any scan (which may be slightly crooked) by going to the Transform Panel in Lightroom Classic and then selecting the Level button and then the Vertical button. You can also move the Rotate slider to display an alignment grid and then rotate the scan to straighten it.

    To turn the negative into a fairly basic positive, use the Tone Curve Panel with the Point Curve. Click on the Point Curve at the top of the Tone Curve Panel (the gray circle with the white dot in the middle) which will give you a straight line in the graph from the bottom left to the top right. Put your cursor on the point at the beginning of the line in the bottom left corner and drag that point up to the top left corner, creating a totally white image. Then place your cursor on the point at the end of the line in the top right corner and drag that point down to the bottom left corner. This step reverses the tone curve and creates a positive from the negative, although it is not perfect and will appear quite flat looking, requiring some additional editing.

    Since we reversed our tone curve, most of our sliders in Lightroom will now also be reversed (so increasing the exposure slider will actually decrease the exposure, so you will need to work with most sliders in reverse). Some sliders, such as Clarity, are not reversed and do work in the direction you would expect.

    Go to the Crop Tool. Adjust your aspect ratio or unlock to independently move each side of our crop window and crop your image, removing anything your camera captured alongside your original photograph.

    Finally, go to the Detail Panel and add some sharpening if you feel the image needs it.

  10. Apply double-sided tape
    Positive image
  11. Finish post-processing your image and save your work.

    Converting color images from negative to positive in Lightroom can be challenging, and some photographers prefer to purchase and use the Negative Lab Pro Lightroom plug-in, which takes your negative and converts it into a positive that is usually superior to simply reversing the tone curve. Once converted, you can continue post-processing your photo in Adobe Lightroom and/or Adobe Photoshop.


John Hultgren
John Hultgren


I am a fine art and conservation photographer, author, and educator from Louisville, Kentucky, who uses photography to advocate for conservation outcomes, protecting nature and improving the natural environment. Conservation photography furthers environmental conservation, wildlife conservation, habitat conservation and cultural conservation by expanding public awareness of issues and stimulating remedial action. You can see more of my work at www.hultgren.org.


ADVERTISEMENT

Photographers Guide to the Great Smoky Mountains
ADVERTISEMENTJohn Hultgren Photography
Copyright © 1990 - 2024 John Hultgren Photography. John Hultgren Photography is a registered trademark.
All rights reserved. All photographs are registered with the United States Copyright Office and protected by international treaties. Photos may not be copied, reproduced, retransmitted, or archived without express permission.