John Hultgren Photography Guides

Photo Matting Guide

Published on October 20, 2023

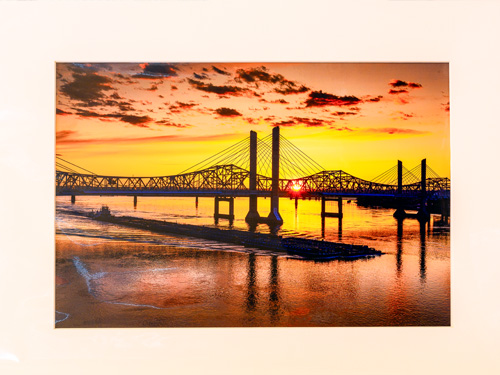
A mat (or matte) is the border of white or colored space surrounding the photo within the frame which creates a layer of space between the edge of the image and the frame. This space allows photos to “breathe” within a frame and protects them from coming into contact with the glass. The separation occurs because the mat, which is often thicker than the photo print, will layer over the top of the outside edges of the photo.

The mat plays a supporting role to the frame and the artwork inside, so it should be carefully chosen. Mats have the power to affect balance and help direct the viewer’s eye based on the size, color, and weight that you have selected.

For your matting project you will need your photograph, one backing board, and one or more matboards.

The first decision you need to make is deciding on the size for your mat project. Some prefer for their photograph to be centered under a mat with a two or three inch border around their photograph. This approach certainly looks very professional but almost always requires a custom frame, which can increase the cost. A cheaper option is to use standard frame sizes frequently found in home and garden stores, first cutting the mat to fit your frame and then cutting an opening to fit your photograph. This frequently results in a mat with a different border width around the photograph. Because you can use a standard frame you can save some money, and it can still look professional.

When I sell my photographs at art shows, I use the mat and a plastic sleeve as a form of packaging for my print, which allows the print to be easily transported to the art show and allows for people to easily flip through my collection of photographs in a bin with their hands. In this situation I cut the mat to fit standard frame sizes, which allows people to buy a packaged photograph from me that is matted and which will fit inside a standard sized frame. (Of course, the person who purchased the photograph can always remove the photo from the packaging and have a custom mat cut to display within a custom frame.) For my art show prints I usually cut my mat to fit in a standard 16 x 20 inch or 20 x 24 inch frame, both of which appear to be popular art show sizes.

For my 16 x 20 inch matted photos, I print my photo on 11 x 14 inch photographic paper. Complicating the matter is that an 11 x 14 inch photo doesn't match the aspect ratio of the photographs taken by my camera. If I were to print my uncropped photograph as an 11 x 14 inch photo I would lose a little bit from each side because a photograph from my camera, which fits perfectly on a 4 x 6 inch or a 16 x 24 inch photo, just doesn't fit on an 11 x 14 inch photo.

To get around this limitation I start by creating an 11 x 14 inch white JPEG 300 dpi sRGB graphic file and then center my photograph on top of this white image. If I didn't do any cropping to my photograph I will now have an 11 x 14 inch printed photo that fully bleeds on two sides but has a ⅝-inch white border on the other two sides. The size of the photograph without the white border is 9-½ x 14 inches (on top of an 11 x 14 inch white image).

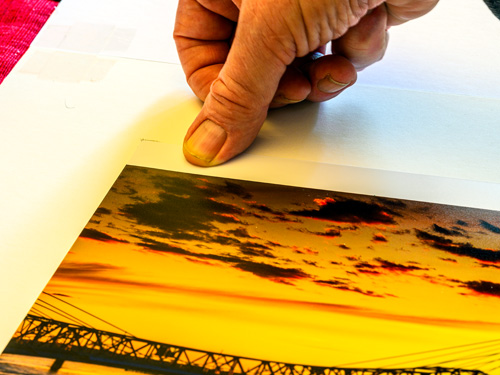
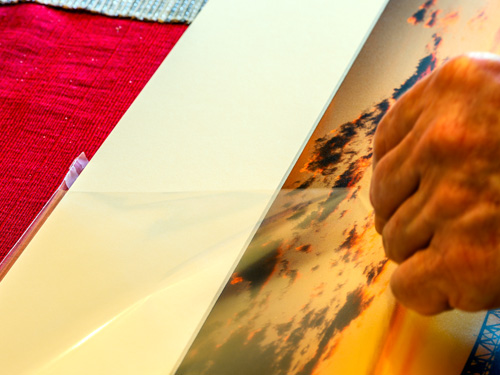
I don't want any part of that white border to be visible through the cut opening on my mat. And, since the 14 inch side runs from edge to edge, I want a little bit of the mat to overlap those full-bleed edges to help hold the photograph in place.

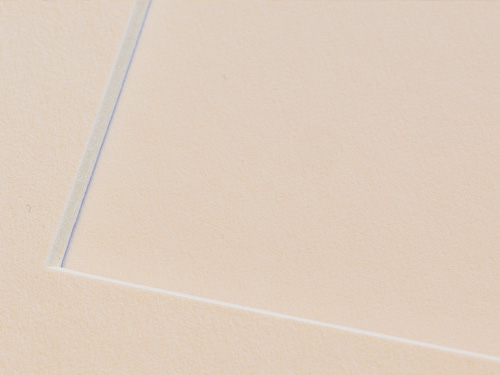
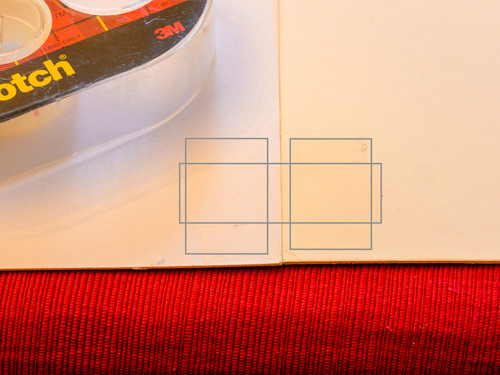
Therefore, I am going to cut a 9-¼ x 13-¾ inch opening in my mat (which is one quarter inch smaller than the visible portion of my photograph on each of the four sides). This will allow almost all of my photograph to be visible under the mat, with a little bit of mat overlapping the edges to help hold the photograph in place.

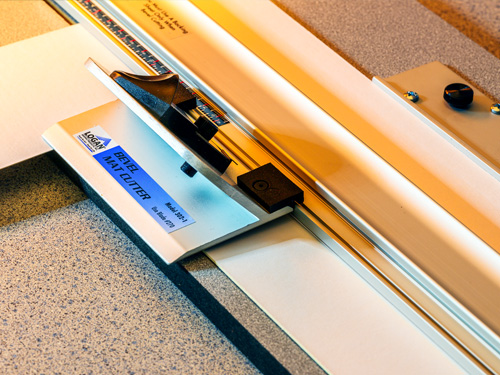
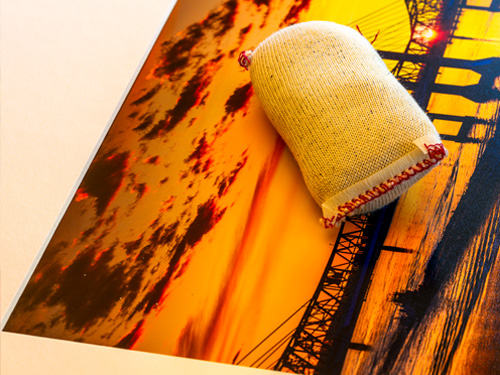
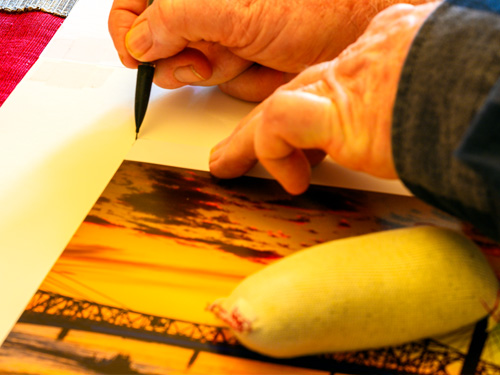
I use the Logan 350-1 Compact Elite Mat Cutter to cut my mats, but cutting mats really does take a little bit of practice. Buying mats custom cut at an art supply or mat shop can be expensive but there are also reasonable places to buy mats cut to your specifications if you shop around. In the past I have ordered cut mats from MATSHOP and they offer resonable pricing. I also have ordered their acid-free coaster board as backing boards for my matting projects.

ADVERTISEMENTJohn Hultgren Photography
Logan 350-1 Compact Elite Mat Cutter
  1. Cutting your own mats takes some practice but it can be done quickly and economically. Follow the instructions that came with your cutting device, mark the back of your mat in pencil where you need to cut the mat and your opening (using a straight cut for the mat edges and a beveled cut for the opening), and carefully cut the mat to fit in your frame and for your opening to display your photograph.

    (Or make it easy on yourself and order pre-cut mats.)

  2. Check your bevel cut and dimensions
    Check your bevel cut and dimensions
  3. In addition to your photograph you will need at least one backing board and one or more matboards for your matting project.

    Check your mat after cutting to make sure you have a nice clean beveled edge cut to the proper dimension. Since your mat is complimenting your photograph and your frame, it is very important that your cut looks professional.

  4. Attach your mat to your backing board
    Attach your mat to your backing board
  5. Lay you mat face down on a table with the top of your mat alongside your backing board. Using Scotch tape, run a piece of Scotch tape from the mat onto the backing board at each upper corner. Then, using additional pieces of Scotch tape, secure both ends of those strips of Scotch tape to the mat and the backing board, making a hinge.

    Your mat and backing board are now one unit that can be folded together along the hinge that you made, which your photograph will be placed inside of.

  6. Position your photograph
    Position your photograph
  7. Slide your photograph face up between the mat and the backing board so that your photograph can be seen through the opening you cut. With clean hands (or while wearing gloves) slide the photograph so that it is properly positioned between the mat and the backing board.

    Place something that will fit within your opening on top of your photograph that is heavy enough to hold your photograph down. (Don't use anything too heavy.) I use a small bean bag.

  8. Mark your upper corners
    Mark your upper corners
  9. Carefully open your mat along the hinges you made to reveal the photograph beneath it, taking care not to disturb your photograph's position on the backing board.

    Using a pencil, carefully mark the two top edges of your photograph on the backing board to be used as a guide to help you mount your photograph to the backing board and have it properly display through the opening in the mat that you cut.

  10. Apply double-sided tape
    Apply double-sided tape
  11. Place one piece of double-sided tape on each upper corner of your photograph. I use Scotch Double-Sided Acid Free Scrapbooking Tape. We only want to tape the two upper corners of the photograph to the backing board, allowing the photograph to float along your backing board during climate changes.

    After you place your tape on the back of your photograph, remove the protective coating from the other side of the tape.

    Secure your print
    Secure your print
  12. Gently press down over the top of the photograph where the two pieces of double-sided tape have been placed.

    Close your mat and make sure that your photograph is still lined up properly underneath your opening. If it isn't, reposition your photograph, and if it is, open your mat back up and press down firmly on the top of your photograph to secure it to the backing board.

  13. Place in frame or plastic sleeve
    Place in frame or plastic sleeve
  14. If you are going to be displaying your matted photograph at art shows or other events where it will not be framed, it is recommended that you placed your matted photograph inside a plastic sleeve to protect your photograph and your mat.

    Or, if you are ready to place your photograph inside your frame, then do that now to protect your mat and photograph.

  15. Enjoy your matted print
    Enjoy your matted print
  16. You have now successfully mattted your photograph and it is ready to be displayed and enjoyed.

    Congratulations!

    The mat and frame should compliment and add to the visual appeal of your photograph, making it look much more professional.


John Hultgren
John Hultgren


I am a fine art and conservation photographer, author, and educator from Louisville, Kentucky, who uses photography to advocate for conservation outcomes, protecting nature and improving the natural environment. Conservation photography furthers environmental conservation, wildlife conservation, habitat conservation and cultural conservation by expanding public awareness of issues and stimulating remedial action. You can see more of my work at www.hultgren.org.


ADVERTISEMENT

Photographers Guide to the Great Smoky Mountains
ADVERTISEMENTJohn Hultgren Photography
Copyright © 1990 - 2024 John Hultgren Photography. John Hultgren Photography is a registered trademark.
All rights reserved. All photographs are registered with the United States Copyright Office and protected by international treaties. Photos may not be copied, reproduced, retransmitted, or archived without express permission.